How to Build an AI Agent: A Practical Guide With Code Examples
AI agents are moving beyond simple chatbots. Instead of only generating text, an AI agent can reason about a task, use tools, access data, make decisions, and take actions.
An ordinary chatbot might answer:
“What is the weather today?”
An AI agent can do much more:
“Check today’s weather, compare it with tomorrow’s forecast, find a suitable time for my outdoor meeting, and add it to my calendar.”
The difference is agency.
An AI agent combines a language model with instructions, tools, memory, data and an execution loop.
In this guide, we’ll build a simple AI agent from scratch and gradually add:
- Tool calling
- External APIs
- Memory
- Multi-step reasoning
- Error handling
- Security controls
- Production considerations
The examples use Python, but the same architecture can be implemented in JavaScript, PHP, Go and other languages.
What Is an AI Agent?
An AI agent is a software system that uses an AI model to determine what actions should be taken to accomplish a goal.
A simplified architecture looks like this:
User
↓
AI Model
↓
Decision
↓
Tool
↓
Result
↓
AI Model
↓
Final Answer
The important part is the loop.
A traditional application follows predefined instructions:
Input → Function → OutputAn AI agent can dynamically choose:
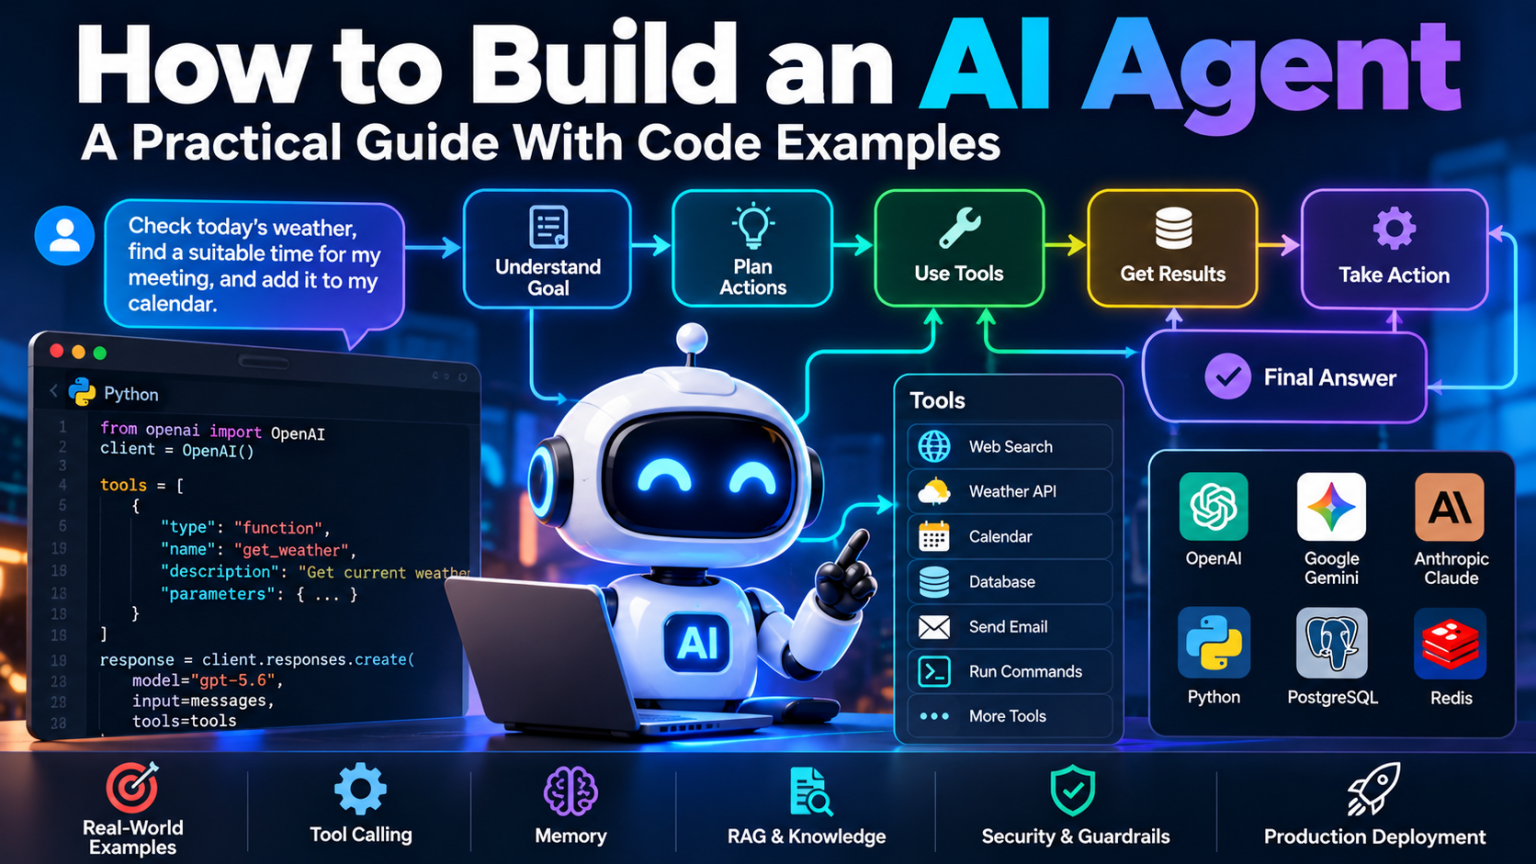
Goal
 ↓
Understand
 ↓
Choose action
 ↓
Use tool
 ↓
Observe result
 ↓
Choose next action
 ↓
Complete task
This makes agents useful for tasks that require multiple steps.
AI Agent vs. Chatbot
The terms are often used interchangeably, but there is an important difference.
| Capability | Chatbot | AI Agent |
|---|---|---|
| Generate text | Yes | Yes |
| Answer questions | Yes | Yes |
| Use tools | Sometimes | Core capability |
| Access external systems | Limited | Yes |
| Multi-step tasks | Limited | Yes |
| Make decisions | Limited | Yes |
| Take actions | Usually no | Yes |
| Maintain task state | Limited | Yes |
| Execute workflows | Limited | Yes |
A chatbot primarily responds.
An agent works toward a goal.
The Five Components of an AI Agent
A practical agent normally contains at least five components.
1. Model
The AI model provides reasoning and language capabilities.
Examples include:
- GPT models
- Claude
- Gemini
- Open-source models
The model determines what it should do based on the available context and tools.
2. Instructions
The agent needs a system-level definition of its role.
For example:
You are a server-management assistant.

You can inspect server status and restart services.

Never delete files or restart production servers without confirmation.
These instructions define the agent’s behavior and boundaries.
3. Tools
Tools allow the agent to interact with the outside world.
Examples:
get_server_status()
restart_service()
search_database()
send_email()
create_ticket()
check_order()
Without tools, an AI model can only generate information.
With tools, it can perform operations.
4. Memory
Memory allows an agent to retain information relevant to the task.
Examples include:
Customer preferences
Previous conversation
Current task state
Previous tool results
Account configuration
Memory can be short-term or persistent.
5. Agent Loop
The agent needs an execution loop that allows it to:
- Understand the goal.
- Decide what to do.
- Call a tool.
- Read the result.
- Decide what to do next.
- Finish the task.
This loop is the core of an agent.
Building Our First AI Agent
Let’s build a simple Python agent.
Our agent will have two tools:
get_weather()
calculate()
The user might ask:
“What’s the weather in London and what is 25% of 240?”
The agent can determine that it needs two tools before answering.
Step 1: Install the OpenAI SDK
Create a Python environment:
python -m venv .venvActivate it on Linux/macOS:
source .venv/bin/activateOn Windows:
.venv\Scripts\activateInstall the SDK:
pip install openaiSet your API key as an environment variable:
export OPENAI_API_KEY="your_api_key"On Windows PowerShell:
$env:OPENAI_API_KEY="your_api_key"Never hard-code API keys directly into your source code.
Step 2: Create a Simple Agent
Start with a basic model call:
from openai import OpenAI

client = OpenAI()

response = client.responses.create(
    model="gpt-5.6",
    input="Explain what an AI agent is in two sentences."
)

print(response.output_text)
At this stage, this isn’t really an agent yet.
It is simply an AI model.
The important part comes next.
Step 3: Add a Tool
Let’s create a calculator tool.
def calculate(expression: str) -> float:
    return eval(expression)
However, using eval() directly on arbitrary AI-generated input is dangerous.
For a real application, use a safe expression parser or restrict the allowed operations.
For demonstration purposes, we can create a safer calculator with explicit operations:
def calculate(operation: str, a: float, b: float) -> float:
    if operation == "add":
        return a + b

    if operation == "subtract":
        return a - b

    if operation == "multiply":
        return a * b

    if operation == "divide":
        if b == 0:
            raise ValueError("Cannot divide by zero")
        return a / b

    raise ValueError("Unsupported operation")
Now the agent has something it can actually execute.
Step 4: Describe the Tool to the Model
The model needs to know:
- What the tool does
- When to use it
- What parameters it accepts
- What those parameters mean
A tool definition can look like:
tools = [
    {
        "type": "function",
        "name": "calculate",
        "description": "Perform a basic mathematical calculation.",
        "parameters": {
            "type": "object",
            "properties": {
                "operation": {
                    "type": "string",
                    "enum": [
                        "add",
                        "subtract",
                        "multiply",
                        "divide"
                    ]
                },
                "a": {
                    "type": "number"
                },
                "b": {
                    "type": "number"
                }
            },
            "required": [
                "operation",
                "a",
                "b"
            ]
        }
    }
]
The model doesn’t execute this function.
It decides when the function should be called.
Your application executes it.
That distinction is extremely important.
Step 5: Execute the Tool
A simplified agent loop looks like this:
response = client.responses.create(
    model="gpt-5.6",
    input="What is 25% of 240?",
    tools=tools
)

for item in response.output:
    if item.type == "function_call":
        print("Tool requested:", item.name)
The model may return a function call with arguments such as:
{
  "operation": "multiply",
  "a": 240,
  "b": 0.25
}
Your application then executes the function.
result = calculate(
    operation="multiply",
    a=240,
    b=0.25
)
The result is then sent back to the model.
Step 6: Complete the Agent Loop
The basic pattern is:
while True:

    response = client.responses.create(
        model="gpt-5.6",
        input=messages,
        tools=tools
    )

    function_calls = [
        item for item in response.output
        if item.type == "function_call"
    ]

    if not function_calls:
        print(response.output_text)
        break

    for call in function_calls:

        if call.name == "calculate":

            args = json.loads(call.arguments)

            result = calculate(**args)

            messages.append(call)

            messages.append({
                "type": "function_call_output",
                "call_id": call.call_id,
                "output": str(result)
            })
This is the fundamental architecture behind many tool-using agents.
Adding a Real API
Let’s make the example more realistic.
Suppose we want an agent that can check server status.
Create a function:
import requests

def get_server_status(server_url):
    response = requests.get(
        server_url,
        timeout=10
    )

    return {
        "status_code": response.status_code,
        "online": response.ok
    }
The agent can now decide when to call it.
For example:
“Check whether https://example.com is online.”
The model determines:
Need server status
        ↓
Call get_server_status
        ↓
Receive HTTP 200
        ↓
Tell user server is online
Building a Hosting Support Agent
This architecture becomes especially useful for hosting providers.
Imagine an AI support agent with tools such as:
tools = [
    "get_server_status",
    "check_disk_usage",
    "check_memory",
    "check_mysql",
    "check_apache",
    "check_nginx",
    "restart_service",
    "create_support_ticket"
]
A customer might say:
“My website is very slow.”
Instead of simply generating troubleshooting instructions, the agent could:
1. Identify the server.
2. Check CPU usage.
3. Check RAM.
4. Check disk usage.
5. Check web-server status.
6. Check database status.
7. Inspect recent errors.
8. Determine likely cause.
9. Recommend a solution.
With appropriate permissions, it could then take corrective action.
Giving an Agent Access to a Database
Agents can also work with structured data.
For example:
def get_customer(customer_id):

    query = """
        SELECT id, name, status
        FROM customers
        WHERE id = ?
    """

    return database.execute(
        query,
        (customer_id,)
    )
The agent could then answer:
“Is customer 1024 active?”
Instead of requiring the user to manually search the database.
However, database access must be carefully controlled.
Never give an AI agent unrestricted SQL access to a production database.
Prefer predefined functions such as:
get_customer()
get_invoice()
get_subscription()
get_server()
get_order()
rather than:
execute_any_sql()Agent Memory
A useful agent needs context.
For example:
conversation = [
    {
        "role": "user",
        "content": "My server is web01."
    },
    {
        "role": "assistant",
        "content": "I'll use web01 for the diagnostic checks."
    }
]
Short-term memory can be stored in the current request.
Persistent memory can be stored in:
- PostgreSQL
- MySQL
- Redis
- Vector databases
- Application-specific storage
The important rule is:
Do not store everything.
Store information that is useful for future tasks.
Vector Databases and Retrieval
Agents sometimes need access to large knowledge bases.
For example, a hosting company might have:
Server documentation
Product documentation
Troubleshooting guides
Security policies
Customer documentation
Internal procedures
Instead of placing all of that information into every prompt, use retrieval.
The basic architecture becomes:
User question
       ↓
Search knowledge base
       ↓
Relevant documents
       ↓
AI model
       ↓
Answer
This approach is commonly called retrieval-augmented generation (RAG).
An agent can combine RAG with tools:
Question
 ↓
Search documentation
 ↓
Check server
 ↓
Analyze results
 ↓
Respond
Multi-Agent Systems
Not every task needs multiple agents.
But complex workflows can be divided into specialized agents.
For example:
                Main Agent
                    |
       ┌────────────┼────────────┐
       ↓            ↓            ↓
   Security      Database     Infrastructure
    Agent          Agent         Agent
A security agent could investigate:
- Malware
- Failed logins
- Firewall events
A database agent could investigate:
- Slow queries
- Connections
- Database errors
An infrastructure agent could investigate:
- CPU
- RAM
- Disk
- Network
The main agent coordinates the workflow.
Don’t Build a Multi-Agent System Too Early
A common mistake is making everything an agent.
If a task can be handled with:
if condition:
    do_something()
you probably don’t need an AI agent.
Agents are most useful when:
- The workflow is variable.
- Decisions depend on context.
- Natural-language input is involved.
- Multiple tools may be required.
- The next action cannot easily be predetermined.
Use normal software for deterministic operations.
Use AI where reasoning and ambiguity actually add value.
Add Guardrails
This is one of the most important parts of production AI agents.
Imagine giving an agent this tool:
delete_server(server_id)That is dangerous.
The model might misunderstand a request.
Instead, separate high-risk actions.
For example:
inspect_server()can be automatic.
But:
delete_server()requires explicit approval.
A safer architecture is:
AI decides
     ↓
Risk check
     ↓
Human approval
     ↓
Tool execution
Tool Permissions Should Be Granular
Don’t give every agent every permission.
For example:
Read-only agent
✓ CPU status
✓ RAM status
✓ Disk status
✓ Logs
✗ Restart
✗ Delete
✗ Modify
Operations agent
✓ Read
✓ Restart service
✓ Clear cache
✗ Delete server
Administrator agent
✓ Read
✓ Modify
✓ Restart
✓ Deploy
The agent should receive only the permissions required for its task.
Validate Tool Arguments
Never assume that because an AI generated a function call, the arguments are safe.
Validate everything.
For example:
def restart_service(service):

    allowed = {
        "nginx",
        "apache2",
        "php8.3-fpm"
    }

    if service not in allowed:
        raise ValueError("Service is not allowed")

    # Execute restart
This prevents an AI model from accidentally invoking arbitrary commands.
Never Give the Agent Raw Shell Access
Avoid tools such as:
run_command(command)unless you have extremely strong isolation and security controls.
Instead of:
run_command("rm -rf /var/www")provide narrowly scoped functions:
get_disk_usage()
restart_nginx()
clear_application_cache()
check_php_status()
This dramatically reduces the attack surface.
Logging and Observability
Every production agent should record:
User request
Model response
Tool selected
Tool arguments
Tool result
Final response
Execution time
Errors
Approval events
For example:
{
  "request_id": "req_123",
  "tool": "restart_nginx",
  "arguments": {
    "server": "web01"
  },
  "approved": true,
  "result": "success"
}
This becomes extremely useful when investigating failures.
Handling Tool Failures
Tools will fail.
A server might be offline.
An API might timeout.
A database might reject a query.
Your agent should handle these conditions gracefully.
try:

    result = check_server(server)

except TimeoutError:

    result = {
        "status": "unknown",
        "error": "Server check timed out"
    }
The model can then explain:
“I couldn’t verify the server because the monitoring endpoint timed out.”
This is much better than inventing a result.
AI Agents Should Never Invent Tool Results
This is a critical rule.
If the agent calls:
check_server()and the tool returns:
timeoutthe agent should not say:
“The server is online.”
It should say:
“I couldn’t verify the server because the status check timed out.”
The application should make tool results authoritative.
Production Architecture
A production AI agent can look like this:
                 User
                   |
                   ↓
              API Gateway
                   |
                   ↓
             Agent Service
                   |
        ┌──────────┼──────────┐
        ↓          ↓          ↓
      Model      Memory     RAG/Search
        |
        ↓
    Tool Router
        |
   ┌────┼─────┬─────┐
   ↓    ↓     ↓     ↓
 Server DB   CRM   Email
   |
   ↓
Infrastructure
This separation makes the system easier to secure and maintain.
Example: A Complete Agent Workflow
Imagine a customer asks:
“My website is down. Please check it.”
The agent might execute:
Step 1
Identify the website.
example.comStep 2
Check DNS.
DNS: OKStep 3
Check HTTP.
HTTP: 502Step 4
Check NGINX.
NGINX: runningStep 5
Check PHP-FPM.
PHP-FPM: stoppedStep 6
Determine likely cause.
502 Bad Gateway caused by unavailable PHP-FPM.Step 7
Ask for approval.
PHP-FPM is stopped. Would you like me to restart it?Step 8
User approves.
Restart PHP-FPM.Step 9
Verify.
HTTP: 200Step 10
Report.
The website is back online.
The issue was caused by PHP-FPM being stopped.
This is a genuine agent workflow.
AI Agent vs. Automation
A traditional automation might be:
Every 5 minutes
 ↓
Check PHP-FPM
 ↓
If stopped
 ↓
Restart PHP-FPM
An agent could be:
Website problem
 ↓
Investigate
 ↓
Check HTTP
 ↓
Check NGINX
 ↓
Check PHP-FPM
 ↓
Check logs
 ↓
Determine cause
 ↓
Decide whether restart is appropriate
Automation is deterministic.
Agents are adaptive.
In many production systems, the best solution is actually both.
Where AI Agents Are Most Useful
AI agents are particularly valuable for:
IT Operations
Monitor → Diagnose → Recommend → RemediateCustomer Support
Question → Search knowledge → Check account → RespondCybersecurity
Alert → Investigate → Correlate → Prioritize → EscalateSales
Lead → Research → Qualify → CRM update → Follow-upFinance
Transaction → Analyze → Categorize → Flag anomaliesDevOps
Incident → Inspect → Diagnose → Suggest fix → DeployResearch
Question → Search → Analyze → Compare → SummarizeCommon AI Agent Mistakes
Mistake 1: Giving the agent too many tools
More tools don’t automatically make an agent better.
A smaller, well-designed toolset is easier for the model to use reliably.
Mistake 2: Giving unrestricted permissions
Never give an agent more access than it needs.
Mistake 3: Using AI for deterministic logic
Don’t use an LLM to calculate a fixed value that a normal function can calculate reliably.
Mistake 4: No validation
Every tool input should be validated.
Mistake 5: No human approval
High-impact actions should require explicit authorization.
Mistake 6: No monitoring
You need to know:
- What the agent did
- Why it did it
- Which tools it used
- What failed
- How long it took
How to Build Your First Production Agent
A practical development path is:
Phase 1 — Basic model
User → AI → ResponsePhase 2 — Add one tool
User → AI → Tool → AI → ResponsePhase 3 — Add multiple tools
User → AI → Tool A → Tool B → AIPhase 4 — Add knowledge retrieval
User → Search → AI → ToolsPhase 5 — Add memory
User → Memory + Knowledge + Tools → AIPhase 6 — Add permissions
AI → Permission Check → ToolPhase 7 — Add human approval
AI → Approval → ToolPhase 8 — Add monitoring
Logs + Metrics + Traces + AuditingThis incremental approach is much safer than attempting to build a fully autonomous agent immediately.
Final Thoughts
Building an AI agent is not simply about connecting an LLM to an API.
The model is only one component.
A useful production agent combines:
Model + Instructions + Tools + Memory + Retrieval + Permissions + Guardrails + Observability
The most important design principle is simple:
Let AI decide what should happen, but let your application control what is actually allowed to happen.
Start small.
Give the agent one clearly defined task.
Add one or two tools.
Validate every tool call.
Add human approval for risky actions.
Then expand gradually.
The future of AI agents is not necessarily fully autonomous software making unrestricted decisions.
The most practical systems will be AI-assisted applications that combine reasoning with controlled access to real-world tools and data.
That is where AI agents become genuinely useful: not just answering questions, but helping people investigate, decide, execute and verify.